background img

The New Stuff

Showing posts with label condensed milk. Show all posts


Choclate Ice cream  with a twist


There are many varieties of chocolate ice creams I am going to put up on the blog. I thought of starting with the best one , this one is spiked with a quarter cup of “Bailleys Irish cream”.
      I wish I could make my food and desserts look more glamorous , but with a simple basic camera and a hectic schedule these are the best results I can manage , so please do not get dissuaded with the looks of the food , it looks the way it is…with a better camera and some cut and paste I can make the food look out of this world…..but I wonder if you will be able to relate to it….I mean the food should look real enough to be eaten …not something so exotic that you feel…would I be able to make that?
Well that’s my expalination and excuse for some not so great pictures of my food. Now lets get on with this delicious and simple home made ice cream.
Ingredients:
1.                 500 ml full cream / full fat milk
2.                 200 ml condensed milk 
3.                 Three tablespoons custard powder
4.                 One fourth cocoa powder
5.                 100 grams shards of milk chocolate
6.                 One fourth to half a cup of powder sugar ( depending on how sweet you want it to be )

Method:
1.                 Place the milk in a heavy bottomed pan and keep it on medium flame , reserve half a cup of milk to dissolve the custard.


2.                 Pour the custard into the boiling milk , and keep stirring till you the custard becomes thick like paint.


3.                 Add the cocoa powder and whisk vigorouly , the custard will become thicker. Turn the  gas off. Now add the shards of milk choclate , condensed milk and sugar while whisking the custard vigorously.


4.                 Let the custard cool off to room temperature  , then pour a quarter cup of baileys Irish cream into it.


5.                 Pour the contents into a aluminium container and freeze.
6.                 After about four to five hours , beat the semi set ice cream in the container itself or in a blender and pour it back into the aluminium box.
7.                 Do the same after another six hours. Thsi step not only makes the icecream lighter and fluffier but also prevents any crystals from forming in the ice cream.
8.                 The ice cream will be ready in about six hours to enjoy.


Choclate Ice cream  with a twist


There are many varieties of chocolate ice creams I am going to put up on the blog. I thought of starting with the best one , this one is spiked with a quarter cup of “Bailleys Irish cream”.
      I wish I could make my food and desserts look more glamorous , but with a simple basic camera and a hectic schedule these are the best results I can manage , so please do not get dissuaded with the looks of the food , it looks the way it is…with a better camera and some cut and paste I can make the food look out of this world…..but I wonder if you will be able to relate to it….I mean the food should look real enough to be eaten …not something so exotic that you feel…would I be able to make that?
Well that’s my expalination and excuse for some not so great pictures of my food. Now lets get on with this delicious and simple home made ice cream.
Ingredients:
1.                 500 ml full cream / full fat milk
2.                 200 ml condensed milk 
3.                 Three tablespoons custard powder
4.                 One fourth cocoa powder
5.                 100 grams shards of milk chocolate
6.                 One fourth to half a cup of powder sugar ( depending on how sweet you want it to be )

Method:
1.                 Place the milk in a heavy bottomed pan and keep it on medium flame , reserve half a cup of milk to dissolve the custard.


2.                 Pour the custard into the boiling milk , and keep stirring till you the custard becomes thick like paint.


3.                 Add the cocoa powder and whisk vigorouly , the custard will become thicker. Turn the  gas off. Now add the shards of milk choclate , condensed milk and sugar while whisking the custard vigorously.


4.                 Let the custard cool off to room temperature  , then pour a quarter cup of baileys Irish cream into it.


5.                 Pour the contents into a aluminium container and freeze.
6.                 After about four to five hours , beat the semi set ice cream in the container itself or in a blender and pour it back into the aluminium box.
7.                 Do the same after another six hours. Thsi step not only makes the icecream lighter and fluffier but also prevents any crystals from forming in the ice cream.
8.                 The ice cream will be ready in about six hours to enjoy.


Baked yogurt


Baked yogurt for me is synonymous with the hot summers of North India , the blistering heat , the afternoon hot breeze and all the stuff which can make anyone sizzle ( metaphorically of course) and then the “Baked yogurt”as a cooling balm .
      I love the fresh lemonade spiked with fresh mint leaves , the chilled buttermilk , kulfi and all those innumerable delicious beverages and chilled desserts which make the hot summers enjoyable.
     One of the desserts I make often during summers is the “Baked Yogurt”. A chilled and creamy pudding where in we just assemble the things , let the oven do the baking and the refrigerator the chilling is how I like to prepare things during the summers. Baked yogurt pudding can be glamorised with mint leaves carelessly strewn on top , or some colourful cake decorations , green cardamon powder , saffron strands , sliced lemons or even candied fruits. Here is the recipe for my all time favourite "Baked yogurt". I am sure you all would love the "Baked yogurt "Pudding "as much as I do.


Ingredients:

1.            300 ml hung curd ( now this requires a bit of explaination, we take the regular curd / yogurt and pour into a muslin / cheese cloth placed on a bowl and tie it and hang it in the refrigerator for about two to three hours depending on how thick the original yogurt is, till all the liquid drains out and we are left with a thick cheese like thing)
2.            One 400 ml tin condensed milk ( I have used Amul brand here , in case you use any other , then replace three heaped tablespoons of the condensed milk with milk to get the same consistency)
3.           Two eggs and two egg yolks.
4.            300 ml full fat milk
5.           ¼ teaspoon green cardamom powder

Method:

1.          Bring the milk and the cardamom powder to a boil in a pan. Remove from the heat , cover with a lid and keep aside till it comes to room temperature.


2.           Beat the eggs ,egg yolks , the yogurt and the condensed milk and mix well.


3.           Slowly pour in the milk while whisking continuously.


4.           Pour into six to eight ramekins .I poured into four ramekins and into two slightly larger aluminium jelly moulds.


5.           Place the ramekins in a roasting dish or a big aluminium cake pan .Fill up with warm water to come half way up the sides .I kept the ramekins and the aluminium moulds in two different tins and two different ovens as there was a difference in the quantity .

6.          Place in a preheated oven at 180° for 22 – 25 minutes till firm to the touch, it shouldn’t be wobbly.


7.          Cool the baked yogurt desserts complelety and then chill for three to four hours before serving.


8.           You could serve them directly in the ramekins if you are using fancy ones or just run a blunt knife around the edge of each yogurt , then invert them onto individual plates or bowls.


9.          You could garnish with just about anything that suits your style, Finely chopped pistachios, grated lemon or orange rind along with skinned wedges of the orange , or just sprinkle some coloured sprinklers like I did.


Baked yogurt


Baked yogurt for me is synonymous with the hot summers of North India , the blistering heat , the afternoon hot breeze and all the stuff which can make anyone sizzle ( metaphorically of course) and then the “Baked yogurt”as a cooling balm .
      I love the fresh lemonade spiked with fresh mint leaves , the chilled buttermilk , kulfi and all those innumerable delicious beverages and chilled desserts which make the hot summers enjoyable.
     One of the desserts I make often during summers is the “Baked Yogurt”. A chilled and creamy pudding where in we just assemble the things , let the oven do the baking and the refrigerator the chilling is how I like to prepare things during the summers. Baked yogurt pudding can be glamorised with mint leaves carelessly strewn on top , or some colourful cake decorations , green cardamon powder , saffron strands , sliced lemons or even candied fruits. Here is the recipe for my all time favourite "Baked yogurt". I am sure you all would love the "Baked yogurt "Pudding "as much as I do.


Ingredients:

1.            300 ml hung curd ( now this requires a bit of explaination, we take the regular curd / yogurt and pour into a muslin / cheese cloth placed on a bowl and tie it and hang it in the refrigerator for about two to three hours depending on how thick the original yogurt is, till all the liquid drains out and we are left with a thick cheese like thing)
2.            One 400 ml tin condensed milk ( I have used Amul brand here , in case you use any other , then replace three heaped tablespoons of the condensed milk with milk to get the same consistency)
3.           Two eggs and two egg yolks.
4.            300 ml full fat milk
5.           ¼ teaspoon green cardamom powder

Method:

1.          Bring the milk and the cardamom powder to a boil in a pan. Remove from the heat , cover with a lid and keep aside till it comes to room temperature.


2.           Beat the eggs ,egg yolks , the yogurt and the condensed milk and mix well.


3.           Slowly pour in the milk while whisking continuously.


4.           Pour into six to eight ramekins .I poured into four ramekins and into two slightly larger aluminium jelly moulds.


5.           Place the ramekins in a roasting dish or a big aluminium cake pan .Fill up with warm water to come half way up the sides .I kept the ramekins and the aluminium moulds in two different tins and two different ovens as there was a difference in the quantity .

6.          Place in a preheated oven at 180° for 22 – 25 minutes till firm to the touch, it shouldn’t be wobbly.


7.          Cool the baked yogurt desserts complelety and then chill for three to four hours before serving.


8.           You could serve them directly in the ramekins if you are using fancy ones or just run a blunt knife around the edge of each yogurt , then invert them onto individual plates or bowls.


9.          You could garnish with just about anything that suits your style, Finely chopped pistachios, grated lemon or orange rind along with skinned wedges of the orange , or just sprinkle some coloured sprinklers like I did.


Sticky date pudding

Do you believe in the saying” Beauty lies in the eyes of the beholder” , well if you don’t then please start believing it otherwise you might not try this delicious recipe .


      I just adore this pudding but I have never been able to do justice to its looks. 
    Infact I made it a couple of times for putting it in the blog but each time I felt that the looks can be made better.
    Then I said to myself , why not just put it up on the blog and ask my viewers , who trust me that the pudding tastes great, to send me an email with the photograph of their own pudding. So are you game for this. Well I already am and am looking forward to some real great pictures of this absolutely amazing and simple dessert which tastes best if served warm or at room temperature.
      
Ingredients:

a)  For the cake

1.          200 grams seedless dates
2.         250 ml boiling hot water
3.        1 teaspoon baking soda
4.    150 grams all purpose flour
5.    ¼ teaspoon baking powder
6.    100 grams brown sugar / demerrara sugar
7.      50 grams butter at room temperature
8.    2 large eggs
9.       Glass baking dish about 10 inches x 6 inches, or an eight inch square or round one

b)  For the sauce

10.        400 ml condensed milk ( I used nestle)
11.       2 tablespoon golden syrup ( I have used Lyles golden  syrup)
12.      5 tablespoons  butter
13.      8 -10  tablespoons water
  
Method:

1.      Place the dates in a bowl and pour one cup of boiling water over them and mix in a teaspoon of baking soda.


2.      Leave side till it comes to room temperature.
3.            Meanwhile measure the rest of the ingredients and  place them  into a food processor and top with the date mixture.
4.         Blend for about a 45 to 60 seconds till well blended but let the tiny pieces of dates remain if not pureed completely as they taste good.
5.       Pour into the greased baking dish and bake at 180° for 30 minutes.


6.  Let cool and then scrape of the tip a bit with a knife and make holes onto the cake with a fork. Well you could skip this part but then the sauce would just go and rest on the sides of your pudding.


At this stage the pudding can be covered and put aside.Incase you are having guests over , you could prepare the sauce just before serving the pudding so that the pudding becomes warm .
7.   For the sticky sauce:

     Pour all the ingredients into a pan and stir on medium flame till the syrup begins to boil from the sides and all the ingredients are well mixed.


8.  Pour the sauce over the pudding , loosen the edges of the cake from the sides so that the sauce can drench the cake from all the corners.


Sticky date pudding

Do you believe in the saying” Beauty lies in the eyes of the beholder” , well if you don’t then please start believing it otherwise you might not try this delicious recipe .


      I just adore this pudding but I have never been able to do justice to its looks. 
    Infact I made it a couple of times for putting it in the blog but each time I felt that the looks can be made better.
    Then I said to myself , why not just put it up on the blog and ask my viewers , who trust me that the pudding tastes great, to send me an email with the photograph of their own pudding. So are you game for this. Well I already am and am looking forward to some real great pictures of this absolutely amazing and simple dessert which tastes best if served warm or at room temperature.
      
Ingredients:

a)  For the cake

1.          200 grams seedless dates
2.         250 ml boiling hot water
3.        1 teaspoon baking soda
4.    150 grams all purpose flour
5.    ¼ teaspoon baking powder
6.    100 grams brown sugar / demerrara sugar
7.      50 grams butter at room temperature
8.    2 large eggs
9.       Glass baking dish about 10 inches x 6 inches, or an eight inch square or round one

b)  For the sauce

10.        400 ml condensed milk ( I used nestle)
11.       2 tablespoon golden syrup ( I have used Lyles golden  syrup)
12.      5 tablespoons  butter
13.      8 -10  tablespoons water
  
Method:

1.      Place the dates in a bowl and pour one cup of boiling water over them and mix in a teaspoon of baking soda.


2.      Leave side till it comes to room temperature.
3.            Meanwhile measure the rest of the ingredients and  place them  into a food processor and top with the date mixture.
4.         Blend for about a 45 to 60 seconds till well blended but let the tiny pieces of dates remain if not pureed completely as they taste good.
5.       Pour into the greased baking dish and bake at 180° for 30 minutes.


6.  Let cool and then scrape of the tip a bit with a knife and make holes onto the cake with a fork. Well you could skip this part but then the sauce would just go and rest on the sides of your pudding.


At this stage the pudding can be covered and put aside.Incase you are having guests over , you could prepare the sauce just before serving the pudding so that the pudding becomes warm .
7.   For the sticky sauce:

     Pour all the ingredients into a pan and stir on medium flame till the syrup begins to boil from the sides and all the ingredients are well mixed.


8.  Pour the sauce over the pudding , loosen the edges of the cake from the sides so that the sauce can drench the cake from all the corners.


Gajar ka halwa
Gajar ka halwa gajar ka halwa Gajar ka halwa Gajar ka halwa Gajar ka halwa

Gajar ka halwa

    I would compare preparing gajar ka halwa to making tea in India….everyone has their own ways of making tea…some boil it for five minutes, some just brew it for five minutes, some use half part water and half part milk,, some use just one teaspoon milk for a big mug of tea …etc  etc...and every way tastes great….

Gajar ka halwa

       What prompted me to put this recipe on the blog is that many kind friends have complimented me generously for my Gajar ka halwa. Infact a friend of mine was so sweet to even compare my Gajar halwa with her mother’s preparation.Wow !!! that  is the ultimate compliment I could get.
   Well this recipe needs  to be shared so that incase you are a little unsatisfied with your preparation you could try this one, may be you would prefer this method of preparing the “Gajar ka halwa”

Gajar ka halwa

     We begin by grating one and half kilos of red carrots. Now I must insist that it should not be fine grating, rather coarse or thick shreds. I prefer the food processor do to it for me….though as children I remember helping our mother in  taking turns in grating kilos and kilos of carrots.


    We will make a reasonable amount , so one and a half kilos is the maximum that we will handle for this one time. You could take half a kilo for the first time and adjust the rest of the things accordingly.
   Pile up the grated carrots in a “heavy bottomed” preferably aluminium kadai. I am an expert in handling huge amounts in a smaller kadai, but I would suggest that take a bigger kadai so that your carrot and milk fills up ¾ th of the kadai.


          Pour one and half litres of thick milk / full cream milk / full fat milk. Keep the flame on high and keep stirring till the milk starts boiling.


           Now begins the difficult part ( the manually grating of the carrots was the easiest , trust me). You have to keep stirring the carrot milk mixture for half an hour to forty five minutes, alternating to low and high flame till all the milk dries up. Yes , you have to keep stirring the carrot- milk mixture till the one and half litres of milk reduces to ….see in the picture….


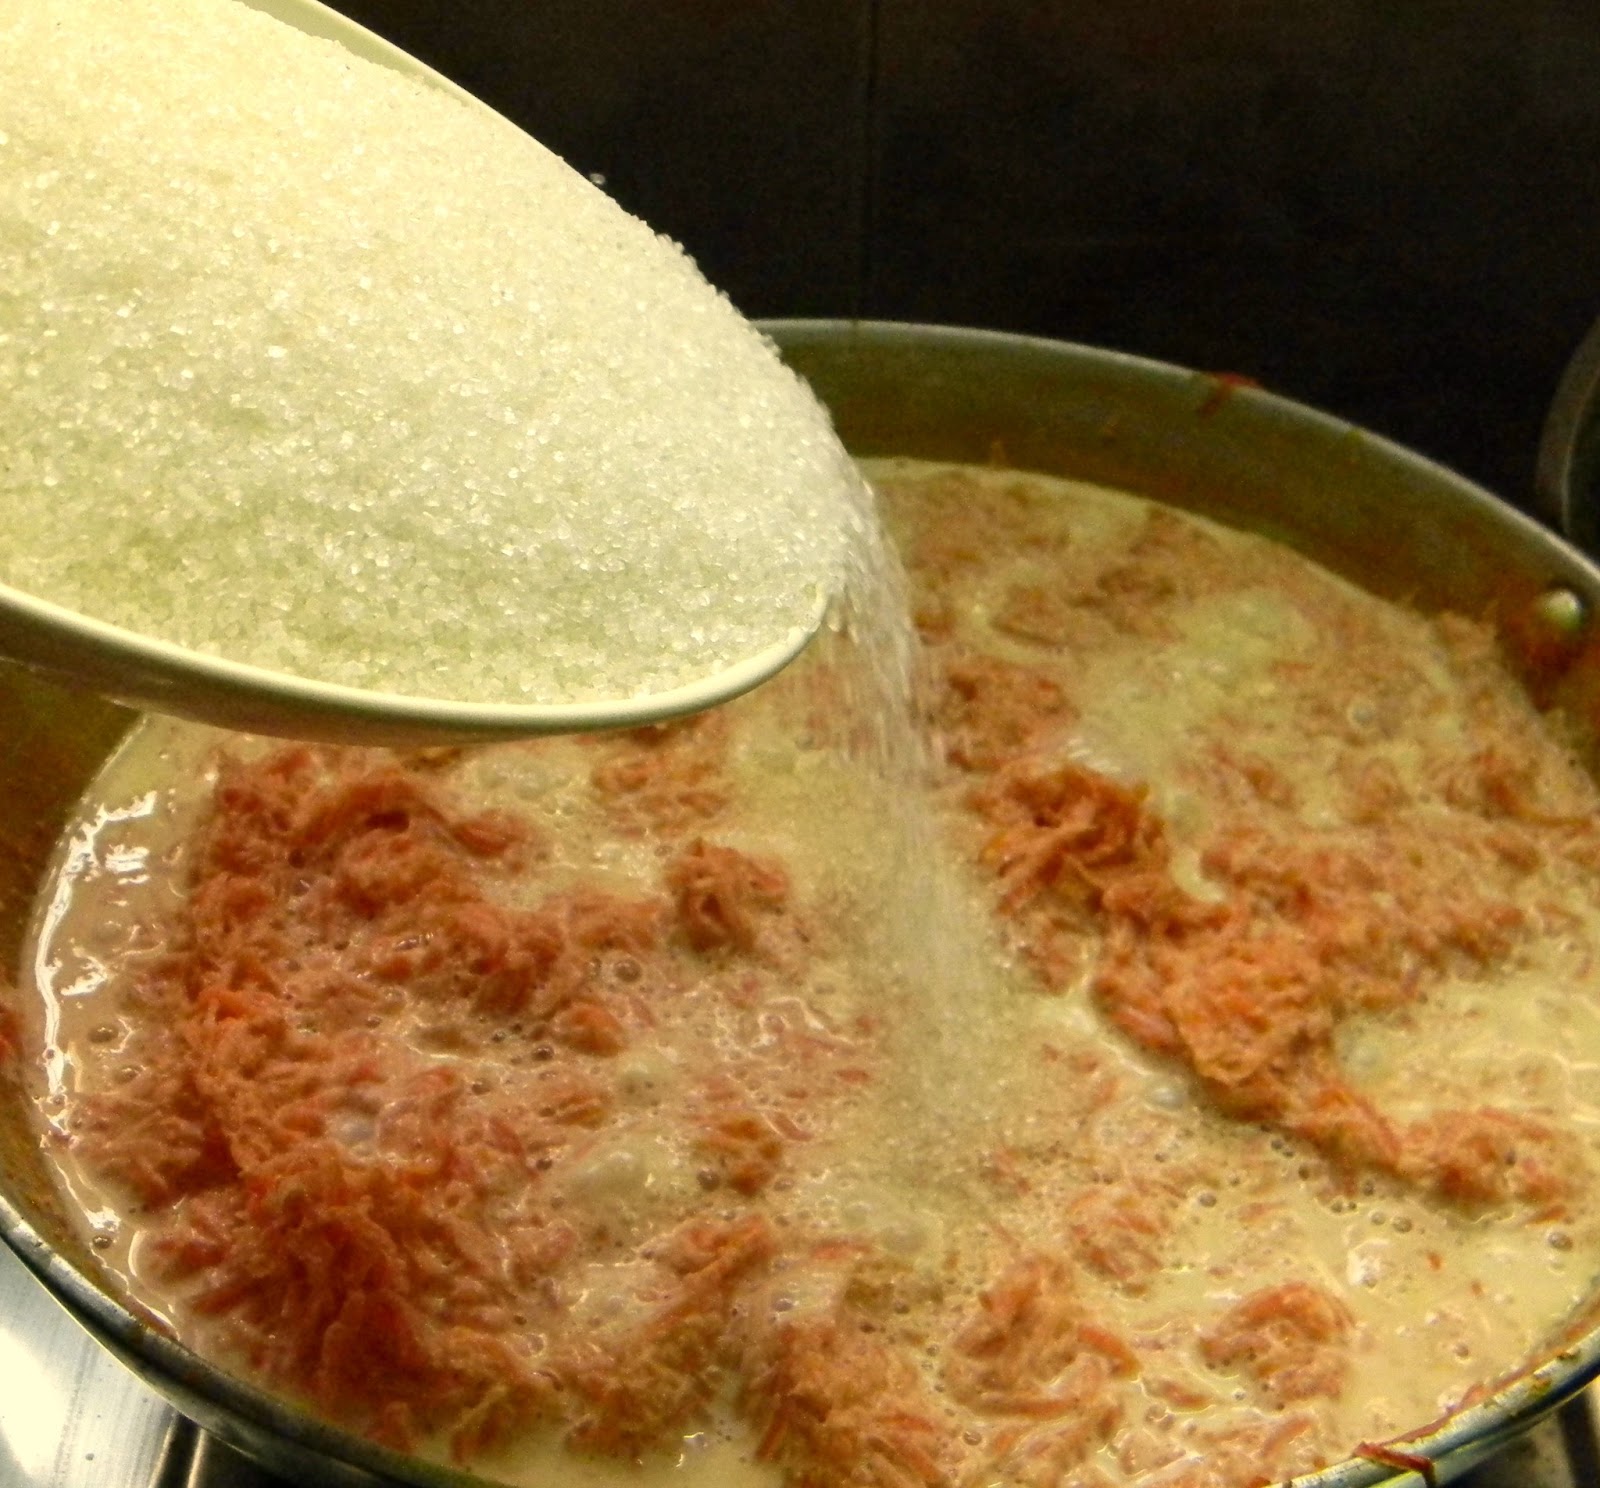
       Add one can of 400ml of condensed milk , stir a little and follow with sugar. Now I must add here that for this quantity I have put 500 grams of sugar but even 300 grams is fine.I have a very sweet tooth and I believe that when you are eating something sweet then why go easy on the sugar….so maybe you could go in between and add 400 grams…its entirely upto you.


          Now don’t panic if the quantity is back to where you started an hour ago….I mean some people are like I just dried this stuff to half and now its back …stay cool….the sugar and condensed milk will dry up in no time and you will have this dense mixture.


       Add one fourth cup of desi ghee and on medium flame stir, toss and roast the halwa. The right word for this action is “Bhoono” in Hindi….and well you just have to do it for atleast ten minutes.Its tiring but trust me this bit is as important to get that caramalised and delicious taste. Add three fourth teaspoon of green cardamon powder. Toss the mixture.


          The "Gajar ka halwa "is ready. You could garnish the Gajar ka Halwa with chopped nuts, but I prefer it plain.

Gajar ka halwa

        lets make a list of the ingredients once again

 1.  1.5 kilo grated carrots
  2. 1.5 litres full fat milk
  3.  500 grams sugar
  4.  400 ml condensed milk
  5.  3/4 th teaspoon green cardamon powder
  6.  1/4 th cup pure ghee


Gajar ka halwa
Gajar ka halwa gajar ka halwa Gajar ka halwa Gajar ka halwa Gajar ka halwa

Gajar ka halwa

    I would compare preparing gajar ka halwa to making tea in India….everyone has their own ways of making tea…some boil it for five minutes, some just brew it for five minutes, some use half part water and half part milk,, some use just one teaspoon milk for a big mug of tea …etc  etc...and every way tastes great….

Gajar ka halwa

       What prompted me to put this recipe on the blog is that many kind friends have complimented me generously for my Gajar ka halwa. Infact a friend of mine was so sweet to even compare my Gajar halwa with her mother’s preparation.Wow !!! that  is the ultimate compliment I could get.
   Well this recipe needs  to be shared so that incase you are a little unsatisfied with your preparation you could try this one, may be you would prefer this method of preparing the “Gajar ka halwa”

Gajar ka halwa

     We begin by grating one and half kilos of red carrots. Now I must insist that it should not be fine grating, rather coarse or thick shreds. I prefer the food processor do to it for me….though as children I remember helping our mother in  taking turns in grating kilos and kilos of carrots.


    We will make a reasonable amount , so one and a half kilos is the maximum that we will handle for this one time. You could take half a kilo for the first time and adjust the rest of the things accordingly.
   Pile up the grated carrots in a “heavy bottomed” preferably aluminium kadai. I am an expert in handling huge amounts in a smaller kadai, but I would suggest that take a bigger kadai so that your carrot and milk fills up ¾ th of the kadai.


          Pour one and half litres of thick milk / full cream milk / full fat milk. Keep the flame on high and keep stirring till the milk starts boiling.


           Now begins the difficult part ( the manually grating of the carrots was the easiest , trust me). You have to keep stirring the carrot milk mixture for half an hour to forty five minutes, alternating to low and high flame till all the milk dries up. Yes , you have to keep stirring the carrot- milk mixture till the one and half litres of milk reduces to ….see in the picture….


       Add one can of 400ml of condensed milk , stir a little and follow with sugar. Now I must add here that for this quantity I have put 500 grams of sugar but even 300 grams is fine.I have a very sweet tooth and I believe that when you are eating something sweet then why go easy on the sugar….so maybe you could go in between and add 400 grams…its entirely upto you.


          Now don’t panic if the quantity is back to where you started an hour ago….I mean some people are like I just dried this stuff to half and now its back …stay cool….the sugar and condensed milk will dry up in no time and you will have this dense mixture.


       Add one fourth cup of desi ghee and on medium flame stir, toss and roast the halwa. The right word for this action is “Bhoono” in Hindi….and well you just have to do it for atleast ten minutes.Its tiring but trust me this bit is as important to get that caramalised and delicious taste. Add three fourth teaspoon of green cardamon powder. Toss the mixture.


          The "Gajar ka halwa "is ready. You could garnish the Gajar ka Halwa with chopped nuts, but I prefer it plain.

Gajar ka halwa

        lets make a list of the ingredients once again

 1.  1.5 kilo grated carrots
  2. 1.5 litres full fat milk
  3.  500 grams sugar
  4.  400 ml condensed milk
  5.  3/4 th teaspoon green cardamon powder
  6.  1/4 th cup pure ghee


Popular Posts