background img

The New Stuff

Showing posts with label school tiffin meals. Show all posts


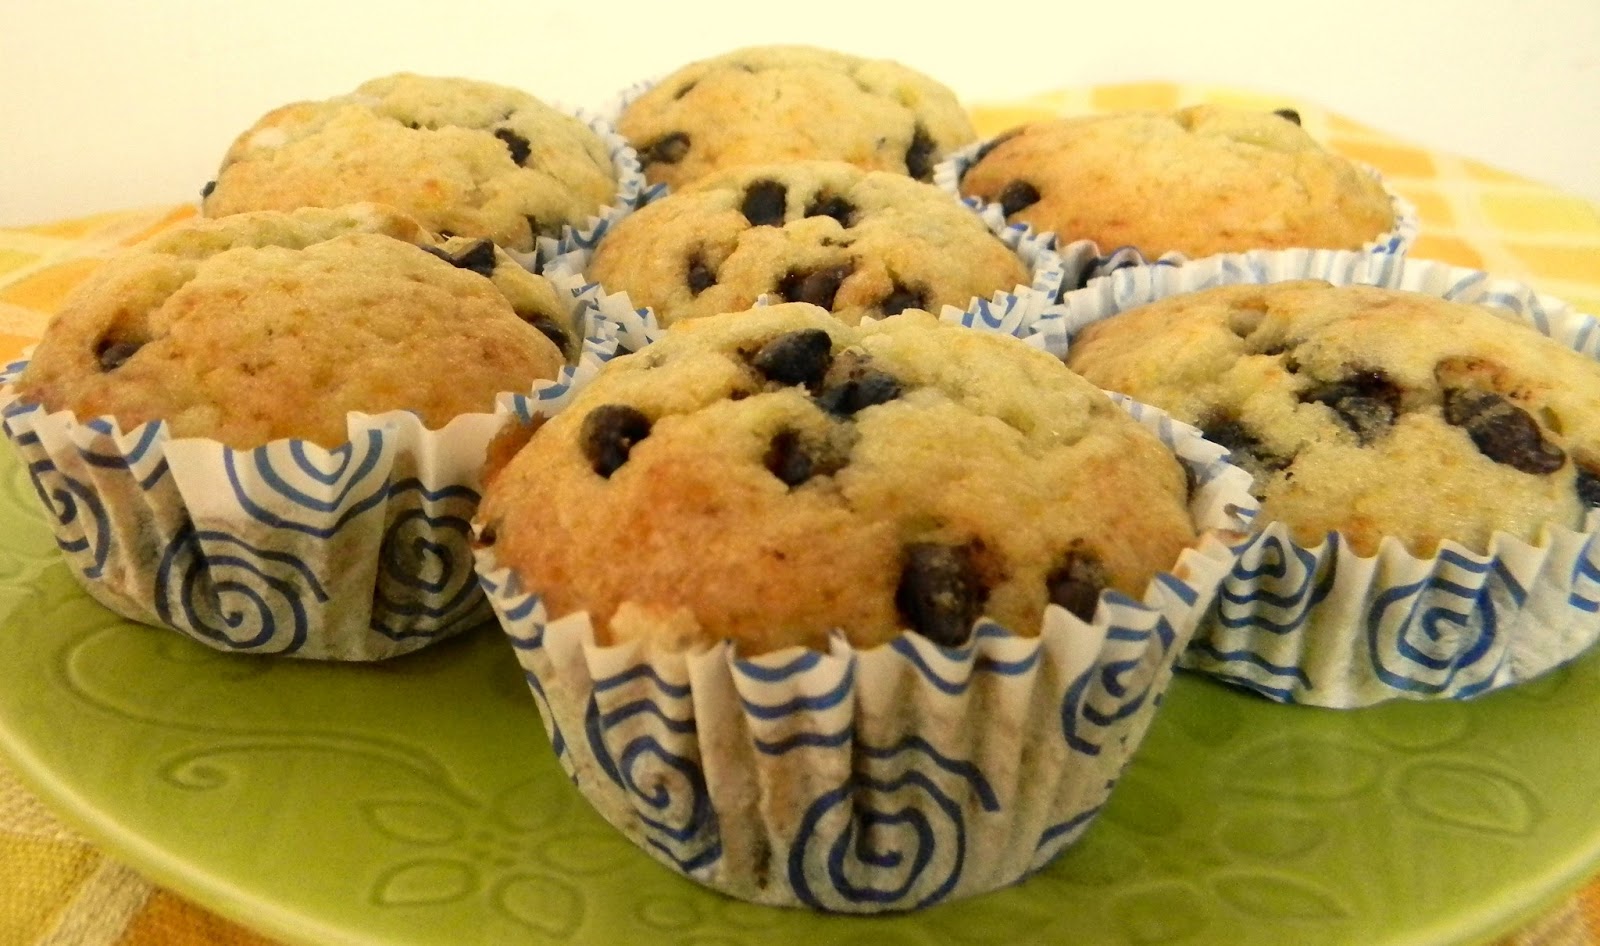
My kids are not too fond of any loaf or cup cakes I make with banana. But what do I do when sometimes I have over ripe bananas and the best way I know is to make cakes out of them. I took a challenge that I would make  such delicious cup cakes that the little devils find them irresistible.


      So here is what I did.

Ingredients:

1.   200 grams flour / one and half cup Indian measuring cup
2.   150 grams powdered sugar / one cup plus two tablespoons
3.   1 ½ teaspoon baking powder
4.   ½ teaspoon baking soda
5.   One cup mashed over ripe bananas
6.   100 grams softened regular salted butter
7.   ¼ cup hot milk / 50 ml
8.   One large egg
9.   100 grams chocolate chips / about a handful
10.      1 teaspoon vanilla essence

Method:
1.  Since the butter is soft / room temperature , it is very easy to cream it with sugar with just a few movements of the whisk.


2.   Add the egg , give a good stir and follow with  the mashed bananas. Don’t worry if the batter looks a little curdled as the flour with sort the problem out.


3.   Sift the flour with the baking powder and soda and gently stir into the batter with out beating too much.


4.   Alternate the flour with spoons fuls of the hot milk and in the end you will get a lumpy and stick batter.
5.   Stir in the chocolate chips and the vanilla essence.


6.   Spoon a tablespoon each into a muffin tray and bake at 190° for 18 – 20 minutes. For my size of the muffin tray which has medium sized cups/ pits I get a turnover of 24 cupcakes , but if the cup size of your cupcakes is larger then I would suggest that you bake for another two minutes more and check with a toothpick inserted in any one cupcake, if it comes out clean and the top of the cup cakes is nice and golden brown , then your cup cakes are ready.


The thing that I love most about these cup cakes is that they taste absolutely delicious when they are straight out of the oven , at room temperature and incidentally even chilled in the refrigerator.
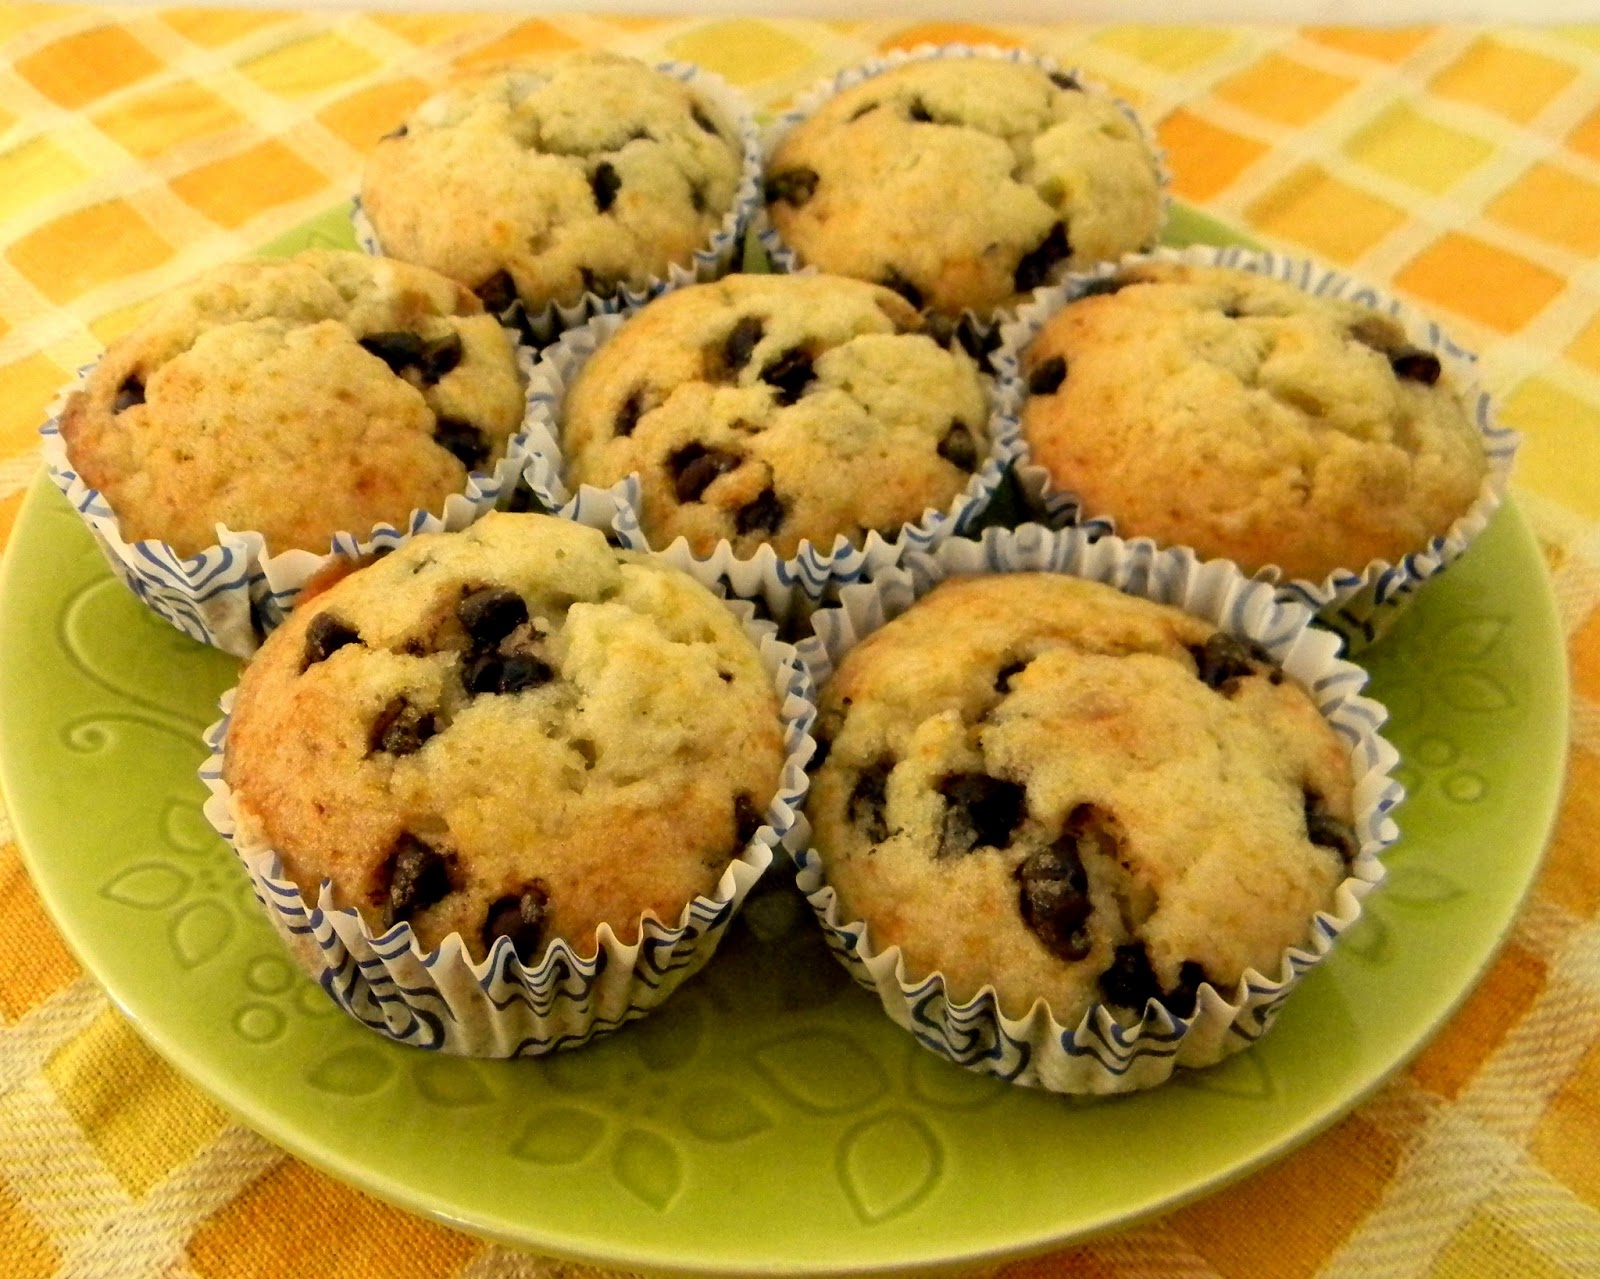

Banana and chocolate chip cup cakes


My kids are not too fond of any loaf or cup cakes I make with banana. But what do I do when sometimes I have over ripe bananas and the best way I know is to make cakes out of them. I took a challenge that I would make  such delicious cup cakes that the little devils find them irresistible.


      So here is what I did.

Ingredients:

1.   200 grams flour / one and half cup Indian measuring cup
2.   150 grams powdered sugar / one cup plus two tablespoons
3.   1 ½ teaspoon baking powder
4.   ½ teaspoon baking soda
5.   One cup mashed over ripe bananas
6.   100 grams softened regular salted butter
7.   ¼ cup hot milk / 50 ml
8.   One large egg
9.   100 grams chocolate chips / about a handful
10.      1 teaspoon vanilla essence

Method:
1.  Since the butter is soft / room temperature , it is very easy to cream it with sugar with just a few movements of the whisk.


2.   Add the egg , give a good stir and follow with  the mashed bananas. Don’t worry if the batter looks a little curdled as the flour with sort the problem out.


3.   Sift the flour with the baking powder and soda and gently stir into the batter with out beating too much.


4.   Alternate the flour with spoons fuls of the hot milk and in the end you will get a lumpy and stick batter.
5.   Stir in the chocolate chips and the vanilla essence.


6.   Spoon a tablespoon each into a muffin tray and bake at 190° for 18 – 20 minutes. For my size of the muffin tray which has medium sized cups/ pits I get a turnover of 24 cupcakes , but if the cup size of your cupcakes is larger then I would suggest that you bake for another two minutes more and check with a toothpick inserted in any one cupcake, if it comes out clean and the top of the cup cakes is nice and golden brown , then your cup cakes are ready.


The thing that I love most about these cup cakes is that they taste absolutely delicious when they are straight out of the oven , at room temperature and incidentally even chilled in the refrigerator.


Idli upma and Idli Manchurian


What does one do with about eight to ten leftover idlis?
 Here is the answer.
  •  Lets begin by crumbling them in a bowl.


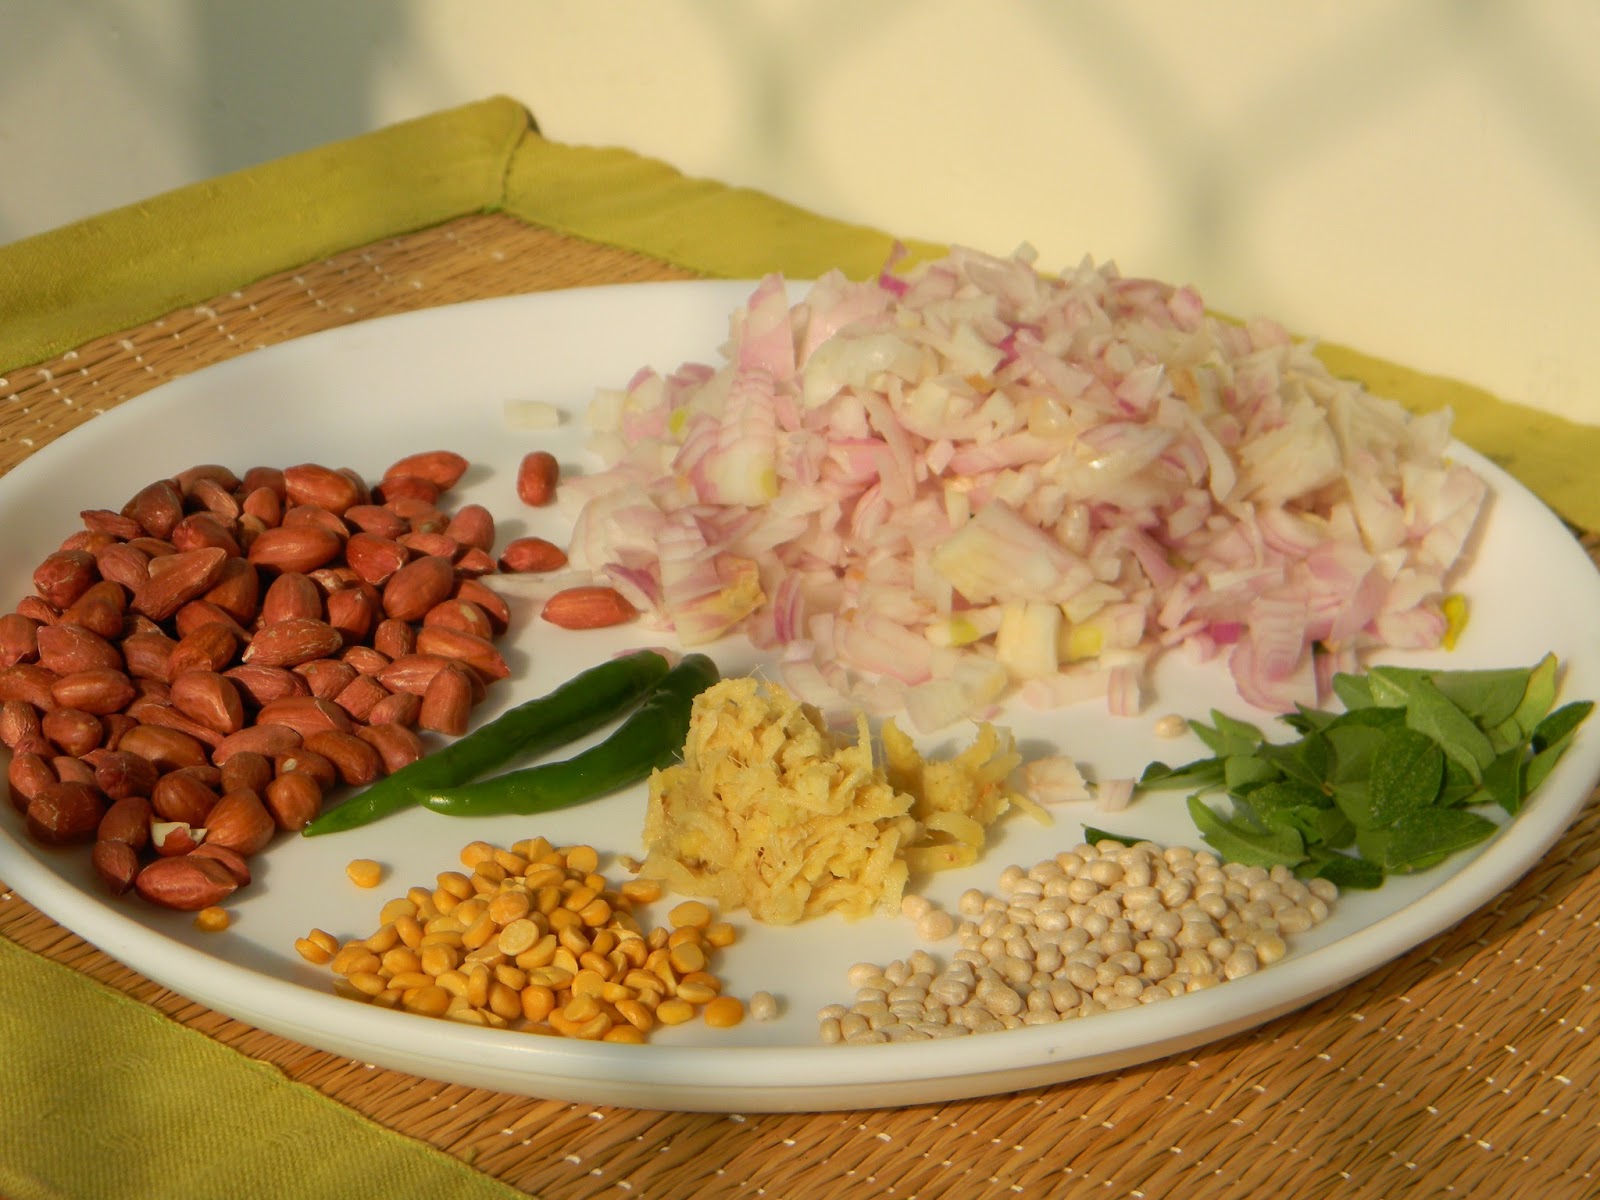
  • Then lets take one teaspoon of mustard seeds ( I forgot to put them in this picture ), a few curry leaves , one inch piece ginger grated , one teaspoon each of urad dal and chana dal , a handful of peanuts and about half a cup of peas ( I added them as an after thought so its not there in the picture ) and three medium onions chopped fine and yes two green chillies chopped fine too.


  • In a pan we take oil anywhere between two to six tablespoons depending on how calorie conscious you are.


  • Throw in the mustard seeds and let them make a lot of noise while spluttering .


  • The curry leaves follow suit.


  • Followed by the dals and let them pinken a little.


  • Add the peanuts and stir till they are cooked completly.


  • Add the grated ginger and stir for a minute.


  • Now its the turn of the chopped onions to go in and turn pink.


  • As I mentioned earlier that the peas was an after thought , you could skip this part if you dont have peas. And if you like them then toss the peas for a while till they are cooked but still a little crunchy.


  • Now comes the crumbled idli for which we have taken so much of pains. Toss them well and add salt to taste.


  • And serve with chutney or even plain tastes nice.


And if that doesn' t suit your style here is another recipe which will use up the idlis and turn out a delicious snack as well. 
Coming up soon is "Idli Manchurian".


Idli upma and Idli Manchurian


What does one do with about eight to ten leftover idlis?
 Here is the answer.
  •  Lets begin by crumbling them in a bowl.


  • Then lets take one teaspoon of mustard seeds ( I forgot to put them in this picture ), a few curry leaves , one inch piece ginger grated , one teaspoon each of urad dal and chana dal , a handful of peanuts and about half a cup of peas ( I added them as an after thought so its not there in the picture ) and three medium onions chopped fine and yes two green chillies chopped fine too.


  • In a pan we take oil anywhere between two to six tablespoons depending on how calorie conscious you are.


  • Throw in the mustard seeds and let them make a lot of noise while spluttering .


  • The curry leaves follow suit.


  • Followed by the dals and let them pinken a little.


  • Add the peanuts and stir till they are cooked completly.


  • Add the grated ginger and stir for a minute.


  • Now its the turn of the chopped onions to go in and turn pink.


  • As I mentioned earlier that the peas was an after thought , you could skip this part if you dont have peas. And if you like them then toss the peas for a while till they are cooked but still a little crunchy.


  • Now comes the crumbled idli for which we have taken so much of pains. Toss them well and add salt to taste.


  • And serve with chutney or even plain tastes nice.


And if that doesn' t suit your style here is another recipe which will use up the idlis and turn out a delicious snack as well. 
Coming up soon is "Idli Manchurian".


Paniyaram


What happens when a Punjabi kudi ( those who don't know my age can permit me to write that) , born in Haryana and spent the lifetime in the remotest corners of the country and met people and made friends with people from all regions of India decide to make Paniyaram.
          By now I have justified the name of my blog which to many seems a little difficult to remember , spell or pronounce.
  Kaleidoscope...where in a little juggle of the hands makes the most beautiful and different designs.Well to me my food looks good and it is different , I will let you all be the judge of the taste as you are the one cooking it.
        I tasted "paniyaram"( I didn't know that was the name of this delicious snack )about eight years back when my neighbour sent me some . I remember to this day that we were living in a temporary accomodation ( ignore it if you can't relate to this term , this living in a two room set with the boxes piled up in the verandah and the neighbours being in such close proximity that each time one sneezes one must say excuse me too , is an absolutely fun experience if one has the right attitude for it ) , so as I was saying that my neighbour with whom I would exchange recipes also taught me how to make this , well being a punjabi myself  I have yet to master it but so far this is the way I figured it out.
     I am fortunate to have a lot of friends from the beautiful south of the country and I am sure they will have lots to add to make this recipe better.
   Lets begin with the soaking of one cup of urad dal along with half a teaspoon of fenugreek seeds overnight.


If you do not get the rounded urad dal in your grocery stores like the one in the picture , no sweat the regular split variety  will do.
Then we take about two cups of idli rice in a seperate utensil and soak it too .


 Every one has their own proportion of the rice and dals to be used  , and also the kind of rice  , and trust me they are all correct.
From my limited knowledge and the little experience in this cuisine per say I would say that by far this proportion 
has given me the best results . Now idli rice might not be available every where so the next best option is to use raw rice in the same proportion. We soak them seperately overnight.


 I prefer using steel as much as possible for my cooking etc .Its a personal choice so you would find steel in all shapes and sizes in my pictures.
Usha , also advised me in investing in a grinder...


...The poor guy is a little old now but has been a faithful friend all these years.
   It makes grinding a lot more easier especially if you a re going to make south Indian food often.
So we begin by draining out any extra water from the dal and grinding it in this machine till it becomes light and fluffy. If you are doing it in your mixer it might take a few minutes longer.


We scoop out the batter into the utensil. I must add here that this lady I am talking about would scoop out the batter while the machine would be on and the stones would be rotating and  grinding with such ease and finesse that it seemd the easiest thing to do. I have yet to be able to do it like her. So I stop the machine and with a little bit of twisting and turning of my hands take out the whole batter so that Ican grind my rice along with two tablespoons of poha to a slightly coarse texture. We scoop again and take out the rice and mix it with the dal  batter along with a teaspoon of salt . Let the batter ferment for about eight hours.


This is the regular idli batter , but we are talking Paniyaram here , so lets treat this batter a little more.
Take a little oil , about two tablespoons and put a teaspoon of mustard seeds, let them splitter and splutter a bit and then quieten them down by adding a few curry leaves followed by two very finely chopped "small onions" or shallots being the right technical term for them. Let them pinken a bit and let the "tadka "cool a bit and then add two cups of the dal idli batter and mix well. You could  use the rest of the batter to make the idlis or else treble the quantity of the tempering and add to the batter to make  lots and lots of "Paniyarams".
We  are not going to use the regular idli steamer here...


but the paniyarakkal....


I use the Prestige non stick one though there are heavy duty iron ones available too . You can even buy a slightly larger size if you want to make more in one go. But they turn out good in a matter of a few minutes so for a small family I feel  this set of seven is fine.
So we put about a tablespoon each into the pits and just to make them tastier a little oil too.


Cover them with a lid and in about a minute turn them over with the help of a spoon.


Serve them hot as they taste best that way with coconut chutney.


Paniyaram


What happens when a Punjabi kudi ( those who don't know my age can permit me to write that) , born in Haryana and spent the lifetime in the remotest corners of the country and met people and made friends with people from all regions of India decide to make Paniyaram.
          By now I have justified the name of my blog which to many seems a little difficult to remember , spell or pronounce.
  Kaleidoscope...where in a little juggle of the hands makes the most beautiful and different designs.Well to me my food looks good and it is different , I will let you all be the judge of the taste as you are the one cooking it.
        I tasted "paniyaram"( I didn't know that was the name of this delicious snack )about eight years back when my neighbour sent me some . I remember to this day that we were living in a temporary accomodation ( ignore it if you can't relate to this term , this living in a two room set with the boxes piled up in the verandah and the neighbours being in such close proximity that each time one sneezes one must say excuse me too , is an absolutely fun experience if one has the right attitude for it ) , so as I was saying that my neighbour with whom I would exchange recipes also taught me how to make this , well being a punjabi myself  I have yet to master it but so far this is the way I figured it out.
     I am fortunate to have a lot of friends from the beautiful south of the country and I am sure they will have lots to add to make this recipe better.
   Lets begin with the soaking of one cup of urad dal along with half a teaspoon of fenugreek seeds overnight.


If you do not get the rounded urad dal in your grocery stores like the one in the picture , no sweat the regular split variety  will do.
Then we take about two cups of idli rice in a seperate utensil and soak it too .


 Every one has their own proportion of the rice and dals to be used  , and also the kind of rice  , and trust me they are all correct.
From my limited knowledge and the little experience in this cuisine per say I would say that by far this proportion 
has given me the best results . Now idli rice might not be available every where so the next best option is to use raw rice in the same proportion. We soak them seperately overnight.


 I prefer using steel as much as possible for my cooking etc .Its a personal choice so you would find steel in all shapes and sizes in my pictures.
Usha , also advised me in investing in a grinder...


...The poor guy is a little old now but has been a faithful friend all these years.
   It makes grinding a lot more easier especially if you a re going to make south Indian food often.
So we begin by draining out any extra water from the dal and grinding it in this machine till it becomes light and fluffy. If you are doing it in your mixer it might take a few minutes longer.


We scoop out the batter into the utensil. I must add here that this lady I am talking about would scoop out the batter while the machine would be on and the stones would be rotating and  grinding with such ease and finesse that it seemd the easiest thing to do. I have yet to be able to do it like her. So I stop the machine and with a little bit of twisting and turning of my hands take out the whole batter so that Ican grind my rice along with two tablespoons of poha to a slightly coarse texture. We scoop again and take out the rice and mix it with the dal  batter along with a teaspoon of salt . Let the batter ferment for about eight hours.


This is the regular idli batter , but we are talking Paniyaram here , so lets treat this batter a little more.
Take a little oil , about two tablespoons and put a teaspoon of mustard seeds, let them splitter and splutter a bit and then quieten them down by adding a few curry leaves followed by two very finely chopped "small onions" or shallots being the right technical term for them. Let them pinken a bit and let the "tadka "cool a bit and then add two cups of the dal idli batter and mix well. You could  use the rest of the batter to make the idlis or else treble the quantity of the tempering and add to the batter to make  lots and lots of "Paniyarams".
We  are not going to use the regular idli steamer here...


but the paniyarakkal....


I use the Prestige non stick one though there are heavy duty iron ones available too . You can even buy a slightly larger size if you want to make more in one go. But they turn out good in a matter of a few minutes so for a small family I feel  this set of seven is fine.
So we put about a tablespoon each into the pits and just to make them tastier a little oil too.


Cover them with a lid and in about a minute turn them over with the help of a spoon.


Serve them hot as they taste best that way with coconut chutney.


Egg dosa / chickpea flour pancakes


Once upon a time there was half a cup of chick pea flour. It was also known by the hindi name of besan. It fell into a mixing bowl.


It asked one cup of water and one level teaspoon of salt  to join in.Then the whisk went whrrr whrrr and they  mixed well and rested  happily in one corner of the kitchen for half an hour.


Four eggs hopped in and the whisk again went whrrr whrrr. 


Then two onions , quarter  cup of coriander leaves, one green chilly and one  inch piece ginger chopped themselves very fine and joined the rest of the gang in the mixing bowl.


Then came a non stick pan with a tablespoon of oil and invited a 
ladle ful of the batter to fall into it.


The pan swirled and the batter spread into a delicious looking pan cake or egg dosa if you care to call it by the original desi name. Another tablespoon of oil went into the pan to make it tastier.


Then it flipped onto the other side to get cooked on both the sides.


It jumped onto a plate and was joined in by a coriander chutney and some tomato ketchup.


Then it got gobbled up by two hungry and naughty children.

Egg dosa / chickpea flour pancakes


Once upon a time there was half a cup of chick pea flour. It was also known by the hindi name of besan. It fell into a mixing bowl.


It asked one cup of water and one level teaspoon of salt  to join in.Then the whisk went whrrr whrrr and they  mixed well and rested  happily in one corner of the kitchen for half an hour.


Four eggs hopped in and the whisk again went whrrr whrrr. 


Then two onions , quarter  cup of coriander leaves, one green chilly and one  inch piece ginger chopped themselves very fine and joined the rest of the gang in the mixing bowl.


Then came a non stick pan with a tablespoon of oil and invited a 
ladle ful of the batter to fall into it.


The pan swirled and the batter spread into a delicious looking pan cake or egg dosa if you care to call it by the original desi name. Another tablespoon of oil went into the pan to make it tastier.


Then it flipped onto the other side to get cooked on both the sides.


It jumped onto a plate and was joined in by a coriander chutney and some tomato ketchup.


Then it got gobbled up by two hungry and naughty children.

Pasta in spinach sauce


Lets make pasta a little more nutritious by adding spinach sauce.

We start by boiling the two cups of penne in plenty of salty water. I couldn't avoid getting the reflection of my kitchen windows in the water.


Boil the penne for atleast ten minutes or till done and then drain it in a colander and run cold water to stop the cooking. Just add a tablespoon of oil to the penne and  toss the pasta to  avoid  it from sticking .


Take two to five tablespoons of butter in a pan and put in on low flame , the moment the butter begins to melt add two tablespoons of crushed garlic.


stir fry on low flame till the garlic...


......turns golden .

Add one cup of thick spinach puree ( I just steamed a big bunch of spinach leaves by giving just one whistle in the pressure cooker without adding any water , squeezed out any excess liquid and pureed it after it cooled down).The result is this thick paste.


stir fry for about a minute and then add about three to five tablespoons of tomato ketchup ( I added the home made ketchup which I have stored in the refrigerator since the day I put it on the blog).


Since all the ingredients are precooked we need not cook any further, just a little stirring on low flame to mix all the things well.
Add the pasta into the pan.


...and  toss it till the sauce coats the pasta well.Add salt to taste ( do remember that we have already added the salt to the boiling water and the ketchup also a fair amount of salt ),  half a teaspoon of black pepper powder and two pinches of nutmeg powder.
Transfer the pasta into a  microwave safe dish and sprinkle some grated cheddar on top.


you can skip this part if you like or add as much cheddar as you like...all to your own personal choice. My kids love cheese so I put lots of it.


warm it in the microwave before serving and the melted cheddar cheese will look delicious and add to the taste as well.


You could  do a bit of a variation to the same recipe by making a thick white sauce and adding the spinach puree and omitting the tomato sauce and mixing the sauce with pasta of you choice and baking for about twenty minutes at 180 degrees.


Pasta in spinach sauce


Lets make pasta a little more nutritious by adding spinach sauce.

We start by boiling the two cups of penne in plenty of salty water. I couldn't avoid getting the reflection of my kitchen windows in the water.


Boil the penne for atleast ten minutes or till done and then drain it in a colander and run cold water to stop the cooking. Just add a tablespoon of oil to the penne and  toss the pasta to  avoid  it from sticking .


Take two to five tablespoons of butter in a pan and put in on low flame , the moment the butter begins to melt add two tablespoons of crushed garlic.


stir fry on low flame till the garlic...


......turns golden .

Add one cup of thick spinach puree ( I just steamed a big bunch of spinach leaves by giving just one whistle in the pressure cooker without adding any water , squeezed out any excess liquid and pureed it after it cooled down).The result is this thick paste.


stir fry for about a minute and then add about three to five tablespoons of tomato ketchup ( I added the home made ketchup which I have stored in the refrigerator since the day I put it on the blog).


Since all the ingredients are precooked we need not cook any further, just a little stirring on low flame to mix all the things well.
Add the pasta into the pan.


...and  toss it till the sauce coats the pasta well.Add salt to taste ( do remember that we have already added the salt to the boiling water and the ketchup also a fair amount of salt ),  half a teaspoon of black pepper powder and two pinches of nutmeg powder.
Transfer the pasta into a  microwave safe dish and sprinkle some grated cheddar on top.


you can skip this part if you like or add as much cheddar as you like...all to your own personal choice. My kids love cheese so I put lots of it.


warm it in the microwave before serving and the melted cheddar cheese will look delicious and add to the taste as well.


You could  do a bit of a variation to the same recipe by making a thick white sauce and adding the spinach puree and omitting the tomato sauce and mixing the sauce with pasta of you choice and baking for about twenty minutes at 180 degrees.


Popular Posts