background img

The New Stuff


Coconut macaroons
Coconut Macaroons  Coconut Macaroons  Coconut Macaroons

Coconut Macaroons

This happens to be one of my favourite recipes because 1) I am sure you know about my love for coconuts by now. 2) I can't think of a simpler way to make them at home . 3) they are Gluten free

Coconut Macaroons

The list can go on.Let me not get carried away. All you need to make these absolutely , unbelievably scrumptious macaroons is two large eggs , ¾ cup castor sugar and three heapful cups of dessicated coconut. ( dry )That’s it.

Coconut Macaroons

Lets begin with this simple story by placing the eggs in a mixing bowl and beating them with an egg beater while sprinkling the sugar a teaspoon at a time.


    Now here lies the secret…..you have to beat the eggs and sugar for atleast 10 -15 minutes ,keeping the bowl and the egg beater tilted in order to incorporate as much air as possible and keep beating till the mixture doubles in volume.


   Now just gently fold in the dessicated coconut and taking approximately a tablespoon at a time of the mixture , gently make round balls by rolling the mixture between your palms and place them on a cookie sheet. You would get about thirty cookies with this batter.


   Bake at 180° for twenty minutes or till golden brown.

Coconut Macaroons

    Cool on a wire rack and store in a airtight container.

Coconut Macaroons


Coconut Macaroons


Sticky date pudding

Do you believe in the saying” Beauty lies in the eyes of the beholder” , well if you don’t then please start believing it otherwise you might not try this delicious recipe .


      I just adore this pudding but I have never been able to do justice to its looks. 
    Infact I made it a couple of times for putting it in the blog but each time I felt that the looks can be made better.
    Then I said to myself , why not just put it up on the blog and ask my viewers , who trust me that the pudding tastes great, to send me an email with the photograph of their own pudding. So are you game for this. Well I already am and am looking forward to some real great pictures of this absolutely amazing and simple dessert which tastes best if served warm or at room temperature.
      
Ingredients:

a)  For the cake

1.          200 grams seedless dates
2.         250 ml boiling hot water
3.        1 teaspoon baking soda
4.    150 grams all purpose flour
5.    ¼ teaspoon baking powder
6.    100 grams brown sugar / demerrara sugar
7.      50 grams butter at room temperature
8.    2 large eggs
9.       Glass baking dish about 10 inches x 6 inches, or an eight inch square or round one

b)  For the sauce

10.        400 ml condensed milk ( I used nestle)
11.       2 tablespoon golden syrup ( I have used Lyles golden  syrup)
12.      5 tablespoons  butter
13.      8 -10  tablespoons water
  
Method:

1.      Place the dates in a bowl and pour one cup of boiling water over them and mix in a teaspoon of baking soda.


2.      Leave side till it comes to room temperature.
3.            Meanwhile measure the rest of the ingredients and  place them  into a food processor and top with the date mixture.
4.         Blend for about a 45 to 60 seconds till well blended but let the tiny pieces of dates remain if not pureed completely as they taste good.
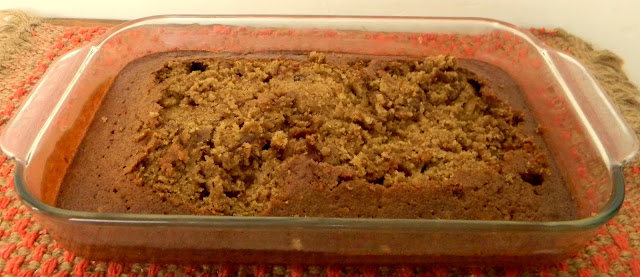
5.       Pour into the greased baking dish and bake at 180° for 30 minutes.


6.  Let cool and then scrape of the tip a bit with a knife and make holes onto the cake with a fork. Well you could skip this part but then the sauce would just go and rest on the sides of your pudding.


At this stage the pudding can be covered and put aside.Incase you are having guests over , you could prepare the sauce just before serving the pudding so that the pudding becomes warm .
7.   For the sticky sauce:

     Pour all the ingredients into a pan and stir on medium flame till the syrup begins to boil from the sides and all the ingredients are well mixed.


8.  Pour the sauce over the pudding , loosen the edges of the cake from the sides so that the sauce can drench the cake from all the corners.


A bit of myself


A few days back I completed five months of blogging and I have been wanting to write a brief introduction about myself and what better than to make it the hundredth post.

      Hello! I am Anjali Singh , a home maker , mother of two children and a “Food blogger”.   I am the sum total of my background , the influence of my family and extended family of relatives and friends, the good and the bad times , the adventures and misadventures and the lessons learnt in the beautiful journey of life so far. 
    Besides my most consuming passion of cooking, I read , do some gardening and embroidery to fulfill the picture of an ideal homemaker .  Being a homemaker has been both a matter of requirement and convenience for me and it gave me a lot of time to hone my skills in cooking . My debut in cooking started by just helping out my mother in the kitchen  , then when I got married , as a pass time and requirement to feed the two of us with some decent grub and slowly and steadily I realized that what I felt was my beginners luck with recipes was actually my hidden love for cooking which made whatever I tried quite palatable at first and then delicious by the second attempt. I find it a challenge to make interesting and delicious recipes with the basic , simple and most easily available ingredients and that’s what reflects in the simplicity of my recipes which now is my USP. I hope you too enjoy making all those meals as much as I do.
       I am aware that there are innumerable food blogs by very talented and creative people , but I have chosen the most convenient competitor…..ME. I strive to perform better than what I performed yesterday in not just cooking and blogging but in all spheres of life .
Thank you for visiting my blog .


Baked chicken corn
Baked chicken corn   Baked chicken corn  Baked chicken corn  Baked chicken corn


Baked chicken corn

I have always liked the idea of using chicken stock instead of milk for making white sauce though it won’t remain white sauce then and replacing whole wheat flour in place of " all purpose flour". Well I guess that makes brown sauce not the traditional white sauce. But  then  this recipe differs in from the others but all these replacements should not compromise on the taste of the dish though it might not look that glamorous. Definietly , anything served with the white sauce as a background would look good , but I can confidently say that this recipe tastes even better than it looks.
       I use whole spices while steaming the chicken to enhance the flavour of the stock. 

Baked chicken corn

    Its another recipe wherein you could make your own additions like adding sausages , mushrooms , a bit of tomato puree , some herbs of your choice , top with parmesan cheese,  add some garlic powder etc etc.
    Thats what I like about some recipes that just with a few changes we can make another delicious one.     

Ingredients:

1.   One cup bite size boneless chicken pieces
2.   Two cups water
3.   Three cloves, one inch cinnamon stick and two black cardamom
4.   Half cup peas
5.   Half  cup frozen corn
6.   Three level tablespoons butter
7.   Four level  tablespoons whole wheat flour
8. one cup elbow macaroni boiled al dente and cooled

Method: 

1.   Place the chicken pieces along with water and spices in a pressure cooker and give two whistles till chicken is cooked. Incase pressure cooking doesnt suit your style , then you could just stir fry the bite size pieces with a little butter in a non stick pan till cooked well and use store bought chicken stock to make the sauce. The recipe can be made with the traditional white sauce too .


2.   Let the chicken cool and then remove the pieces and then strain the stock and put in the refrigerator to chill.


3.   Boil the corn and peas in salty water till cooked but still crunchy , strain and keep aside.


4.   Boil a cup of elbow macaroni and keep aside.


5.   Now lets assemble all these things with a common base, take three tablespoons of butter in a big pan and add four  tablespoons of whole wheat flour . On a medium flame stir for two mintues .


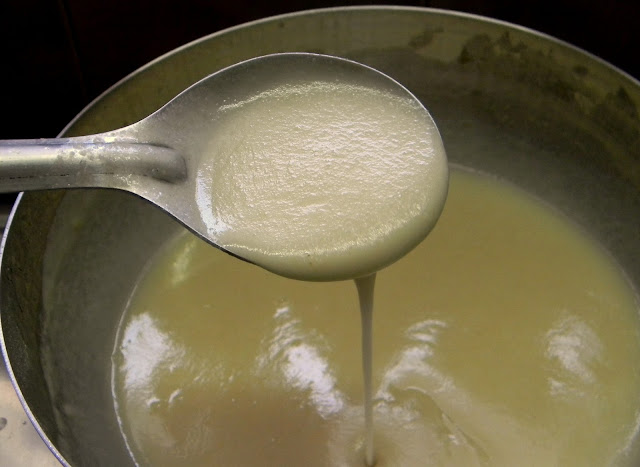
6.   Turn the gas off and add the chilled stock and keep stirring continuously to avoid getting any lumps , turn the gas on medium heat and keep stirring till you get a sauce as thick as this , it will get thicker on cooling.


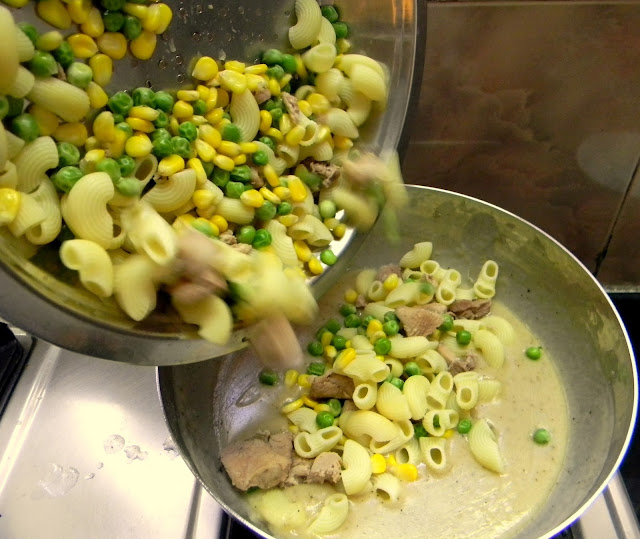
7.   When the sauce comes at room temperature just tumble in the rest of the things and season with salt and pepper to taste.


Baked chicken corn

8.   Transfer to a greased baking dish and if you want you could sprinkle some cheddar cheese on top. Parmesan is not so easily available in few places in India whereas Cheddar is, but if you are lucky to get good parmesan , then that is a better choice to sprinkle over the prepared dish. You could refrigerate it at this stage covered with a cling film or a cover and bake it uncovered  later .

Baked chicken corn


9.   Bake at 180° for twenty minutes and serve hot with buttered toast. I made a spinach loaf to go with it.


Baked chicken corn


Baked chicken corn


Matar paneer


Every delicious recipe does’nt look glamorous. Here is an example , this version of “matar paneer “ tastes so good that it’s a pity that the looks don’t compliment the taste.

    Ingredients:

1.    400 grams peas
2.    200 grams cubed cottage cheese / paneer
3.    Three to four tablespoons desi ghee / clarified butter
4.    1 teaspoon coriander powder
5.    ¼ teaspoon turmeric powder
6.    ¾  teaspoon Kashmiri red chilli powder
7.    ½  teaspoon garam masala
8.    Salt to taste
9.    2 medium onions chopped fine
10.      Four medium tomatoes pureed
11.      1 tablespoon ginger garlic paste
12.      Two tablespoons cashew nut powder
13.      Two tablespoon thick curd

Method:

1.   In a small pan or kadai , take 2 tablespoon of desi ghee and deep fry the small cubes of paneer in batches till just about golden and put them on a absorbant paper.
2.   After the whole lot of paneer is done , transfer them in to bowl of warm water with half a teaspoon of salt and a generous pinch of turmeric powder. This method ensures that the paneer pieces remain soft and not turn rubbery.
3.   Take the rest of the  ghee in a bigger pan and strain the one in which you stir fried the paneer into it. We will use that too in our cooking.
4.   When the ghee becomes warm add a teaspoon of cumin seeds and the moment they change colour , add the onions and stir fry till they turn pink.
5.   Add coriander powder, turmeric and red chilli powder and stir for a few seconds.
6.  Add the ginger garlic paste and stir fry for a minute or till the raw smell of the paste goes away.
7.   Tumble in the peas and stir without covering for about two minutes.
8.   Add about a quarter cup of water and cover and let the peas cook on medium flame till almost done. Remember that once we add the tomato puree, not much cooking will be possible.
9.   Once the peas are almost done add the puree and let the flame be on medium and cook uncovered till the excess water dries up and we are left with a little sauce or curry just coating the matar and paneer.
10.      Now is the time to add the  paneer cubes after draining them and shaking off the water, cashew nut powder ,salt and the curd and the moment a boil comes, just turn the gas off.
11.      Sprinkle the garam masala and give one stir .
12.      Serve garnished with coriander leaves with roti or purees.


Popular Posts