background img

The New Stuff

Showing posts with label south Indian food. Show all posts

Potato bell pepper stir fry with coconut


A few basic ingredients tumbled in together and given a quick stir and just a green chilli to spice it all up with salt as a seasoning , and there we have a delicious vegetable preparation to eat with rice and dal or even with dosas or the ever favourite roti or pao.
       The curry leaves and the mustard seeds give such a beautiful coating to the tossed potato and bell pepper and if that wasn’t enough , there we have a few tablespoons of freshly grated coconut to add some mild flavor and enhance the taste.
If the above few lines have tantalized and tickled your taste buds, here is the simple recipe for you to make it right away at your very own kitchen.

Ingredients:


1.   One heaped cup of cubed potato
2.   ¾ cup of cubed green bell pepper
3.   One green chilli chopped fine
4.   ½ teaspoon mustard seeds
5.    A few fresh curry leaves
6.    Salt to taste or about half a teaspoon
7.   3 tablespoons freshly grated coconut
8.   Two tablespoons refined oil ( I used ground nut oil)

Method:

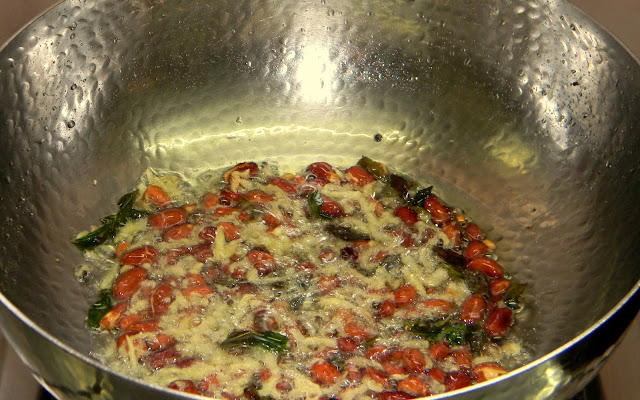
1.   Take oil in a pan and warm it on medium heat , add the mustard seeds and the moment they begin to splutter , add the curry leaves followed by the green chilli.


2.   Tumble in the cubed potato and sprinkle some water and give a good toss.


3.   Cover and let the potatoes cook , stirring in between and if you feel that the potatoes are sticking to the pan then add a few tablespoons of water.
4.   When the potaoes are cooked , that you could check by slicing through a cube with the spatula , tumble in the capsicum and stir fry for about 3-5 minutes  without covering till the bell pepper / capsicum is cooked but still crunchy and green.


5.   Add the grated coconut and season with salt and stir fry for 3- 5 minutes. Care is to be taken to stop the cooking if you feel that the coconut is changing the colour. The coconut should remain whitish and crunchy. The entire cooking is done on medium flame.


Avial


If you have not read my post on “prawn curry “ being a pure vegetarian , you will not understand a Punjabis reverence for coconut oil . Besides the story there , there is another reason why I began to appreciate the contribution of coconut in enhancing the flavours of the vegetables.
        We spent about an year in the Andaman and Nicobar islands and there the vegetables are shipped from the mainland , so not only are they expensive but also not so easy to get in plenty, and above all they are not as juicy and fresh because of the long journey they have done from the mainland to this island.
      I used to eat fish back then so we did enjoy a lot of fish curries and fish pakoras and lobsters and all the stuff but there are times when even a pure non vegetarian craves for colourful and palatable veggies.
      Somehow the vegetable preparations  did not appeal to my pernickety nature and since my kids were small and naturally fussy eaters it was quite a challenge to make them eat anything at all.
       It was then that I began the use of coconut as often as possible in most vegetable  preparations whether they were dry or with a bit of a curry.
      There is an excellent and simplest way to have raw papaya with coconut and it was a hit with my family.I would soon be putting it on the blog.
       Luckily for me coconut was one thing which obviously was in abundance and I have yet to taste a sweeter and more delicious coconut than what you get in the Andamans.  And there were these two trees right in front of our house and I got about a hundred something from them and I distributed them generously besides keeping lots for myself.


I still remember that I had a hand coconut grater and in one go I grated 17 coconuts and about seventy in three days. I froze them for future use and used them liberally in all recipes.
   So that is my story behind  my extensive use of coconuts and making South Indian dishes with the same . Lets get on with the recipe of Avial , which can be altered to whatever vegetables you like and skip the ones you dont as long as you use the vegetables which are firm like carrots , yam etc.
                        
Ingredients:


1.   One cup sliced thick and one inch long potatoes
2.   One cup beans sliced long
3.   One cup sliced  carrots
4.   One cup peas
5.   Half a cup thick yogurt
6.   Half a teaspoon turmeric powder
7.   One teaspoon salt or to taste
8.   One green chilli slit
9.   Coconut oil
10.   One cup grated coconut
11.  A few curry leaves
12.  Half a teaspoon cumin seeds
13.  One green chilli or to taste
14.  Half a cup of water

 Method:

1.   Place the chopped vegetables in a pot and add turmeric powder, the sliced green chilli and half a cup of water.


2.   Cover and let cook on medium flame till completlety cooked , toss the vegetables in between so that they cook evenly.


3.   Meanwhile place the coconut , cumin seeds and the green chilli with about four tablespoons of water  and just give one blitz, do not over grind, the coconut is not to become a paste, the whole idea is to just give one quick mix to the ingredients.


4.   When the vegetables are completetly done , add the coconut mixture, give one stir and turn the gas off.


5.   Add the curd , another stir followed by the salt.


6.   You could pour the coconut oil now or just before serving .


7.   Tastes great just by itself with plain boiled rice or with accompaniments of your choice.


Avial


If you have not read my post on “prawn curry “ being a pure vegetarian , you will not understand a Punjabis reverence for coconut oil . Besides the story there , there is another reason why I began to appreciate the contribution of coconut in enhancing the flavours of the vegetables.
        We spent about an year in the Andaman and Nicobar islands and there the vegetables are shipped from the mainland , so not only are they expensive but also not so easy to get in plenty, and above all they are not as juicy and fresh because of the long journey they have done from the mainland to this island.
      I used to eat fish back then so we did enjoy a lot of fish curries and fish pakoras and lobsters and all the stuff but there are times when even a pure non vegetarian craves for colourful and palatable veggies.
      Somehow the vegetable preparations  did not appeal to my pernickety nature and since my kids were small and naturally fussy eaters it was quite a challenge to make them eat anything at all.
       It was then that I began the use of coconut as often as possible in most vegetable  preparations whether they were dry or with a bit of a curry.
      There is an excellent and simplest way to have raw papaya with coconut and it was a hit with my family.I would soon be putting it on the blog.
       Luckily for me coconut was one thing which obviously was in abundance and I have yet to taste a sweeter and more delicious coconut than what you get in the Andamans.  And there were these two trees right in front of our house and I got about a hundred something from them and I distributed them generously besides keeping lots for myself.


I still remember that I had a hand coconut grater and in one go I grated 17 coconuts and about seventy in three days. I froze them for future use and used them liberally in all recipes.
   So that is my story behind  my extensive use of coconuts and making South Indian dishes with the same . Lets get on with the recipe of Avial , which can be altered to whatever vegetables you like and skip the ones you dont as long as you use the vegetables which are firm like carrots , yam etc.
                        
Ingredients:


1.   One cup sliced thick and one inch long potatoes
2.   One cup beans sliced long
3.   One cup sliced  carrots
4.   One cup peas
5.   Half a cup thick yogurt
6.   Half a teaspoon turmeric powder
7.   One teaspoon salt or to taste
8.   One green chilli slit
9.   Coconut oil
10.   One cup grated coconut
11.  A few curry leaves
12.  Half a teaspoon cumin seeds
13.  One green chilli or to taste
14.  Half a cup of water

 Method:

1.   Place the chopped vegetables in a pot and add turmeric powder, the sliced green chilli and half a cup of water.


2.   Cover and let cook on medium flame till completlety cooked , toss the vegetables in between so that they cook evenly.


3.   Meanwhile place the coconut , cumin seeds and the green chilli with about four tablespoons of water  and just give one blitz, do not over grind, the coconut is not to become a paste, the whole idea is to just give one quick mix to the ingredients.


4.   When the vegetables are completetly done , add the coconut mixture, give one stir and turn the gas off.


5.   Add the curd , another stir followed by the salt.


6.   You could pour the coconut oil now or just before serving .


7.   Tastes great just by itself with plain boiled rice or with accompaniments of your choice.


Idli upma and Idli Manchurian


What does one do with about eight to ten leftover idlis?
 Here is the answer.
  •  Lets begin by crumbling them in a bowl.


  • Then lets take one teaspoon of mustard seeds ( I forgot to put them in this picture ), a few curry leaves , one inch piece ginger grated , one teaspoon each of urad dal and chana dal , a handful of peanuts and about half a cup of peas ( I added them as an after thought so its not there in the picture ) and three medium onions chopped fine and yes two green chillies chopped fine too.


  • In a pan we take oil anywhere between two to six tablespoons depending on how calorie conscious you are.


  • Throw in the mustard seeds and let them make a lot of noise while spluttering .


  • The curry leaves follow suit.


  • Followed by the dals and let them pinken a little.


  • Add the peanuts and stir till they are cooked completly.


  • Add the grated ginger and stir for a minute.


  • Now its the turn of the chopped onions to go in and turn pink.


  • As I mentioned earlier that the peas was an after thought , you could skip this part if you dont have peas. And if you like them then toss the peas for a while till they are cooked but still a little crunchy.


  • Now comes the crumbled idli for which we have taken so much of pains. Toss them well and add salt to taste.


  • And serve with chutney or even plain tastes nice.


And if that doesn' t suit your style here is another recipe which will use up the idlis and turn out a delicious snack as well. 
Coming up soon is "Idli Manchurian".


Paniyaram


What happens when a Punjabi kudi ( those who don't know my age can permit me to write that) , born in Haryana and spent the lifetime in the remotest corners of the country and met people and made friends with people from all regions of India decide to make Paniyaram.
          By now I have justified the name of my blog which to many seems a little difficult to remember , spell or pronounce.
  Kaleidoscope...where in a little juggle of the hands makes the most beautiful and different designs.Well to me my food looks good and it is different , I will let you all be the judge of the taste as you are the one cooking it.
        I tasted "paniyaram"( I didn't know that was the name of this delicious snack )about eight years back when my neighbour sent me some . I remember to this day that we were living in a temporary accomodation ( ignore it if you can't relate to this term , this living in a two room set with the boxes piled up in the verandah and the neighbours being in such close proximity that each time one sneezes one must say excuse me too , is an absolutely fun experience if one has the right attitude for it ) , so as I was saying that my neighbour with whom I would exchange recipes also taught me how to make this , well being a punjabi myself  I have yet to master it but so far this is the way I figured it out.
     I am fortunate to have a lot of friends from the beautiful south of the country and I am sure they will have lots to add to make this recipe better.
   Lets begin with the soaking of one cup of urad dal along with half a teaspoon of fenugreek seeds overnight.


If you do not get the rounded urad dal in your grocery stores like the one in the picture , no sweat the regular split variety  will do.
Then we take about two cups of idli rice in a seperate utensil and soak it too .


 Every one has their own proportion of the rice and dals to be used  , and also the kind of rice  , and trust me they are all correct.
From my limited knowledge and the little experience in this cuisine per say I would say that by far this proportion 
has given me the best results . Now idli rice might not be available every where so the next best option is to use raw rice in the same proportion. We soak them seperately overnight.


 I prefer using steel as much as possible for my cooking etc .Its a personal choice so you would find steel in all shapes and sizes in my pictures.
Usha , also advised me in investing in a grinder...


...The poor guy is a little old now but has been a faithful friend all these years.
   It makes grinding a lot more easier especially if you a re going to make south Indian food often.
So we begin by draining out any extra water from the dal and grinding it in this machine till it becomes light and fluffy. If you are doing it in your mixer it might take a few minutes longer.


We scoop out the batter into the utensil. I must add here that this lady I am talking about would scoop out the batter while the machine would be on and the stones would be rotating and  grinding with such ease and finesse that it seemd the easiest thing to do. I have yet to be able to do it like her. So I stop the machine and with a little bit of twisting and turning of my hands take out the whole batter so that Ican grind my rice along with two tablespoons of poha to a slightly coarse texture. We scoop again and take out the rice and mix it with the dal  batter along with a teaspoon of salt . Let the batter ferment for about eight hours.


This is the regular idli batter , but we are talking Paniyaram here , so lets treat this batter a little more.
Take a little oil , about two tablespoons and put a teaspoon of mustard seeds, let them splitter and splutter a bit and then quieten them down by adding a few curry leaves followed by two very finely chopped "small onions" or shallots being the right technical term for them. Let them pinken a bit and let the "tadka "cool a bit and then add two cups of the dal idli batter and mix well. You could  use the rest of the batter to make the idlis or else treble the quantity of the tempering and add to the batter to make  lots and lots of "Paniyarams".
We  are not going to use the regular idli steamer here...


but the paniyarakkal....


I use the Prestige non stick one though there are heavy duty iron ones available too . You can even buy a slightly larger size if you want to make more in one go. But they turn out good in a matter of a few minutes so for a small family I feel  this set of seven is fine.
So we put about a tablespoon each into the pits and just to make them tastier a little oil too.


Cover them with a lid and in about a minute turn them over with the help of a spoon.


Serve them hot as they taste best that way with coconut chutney.


Popular Posts